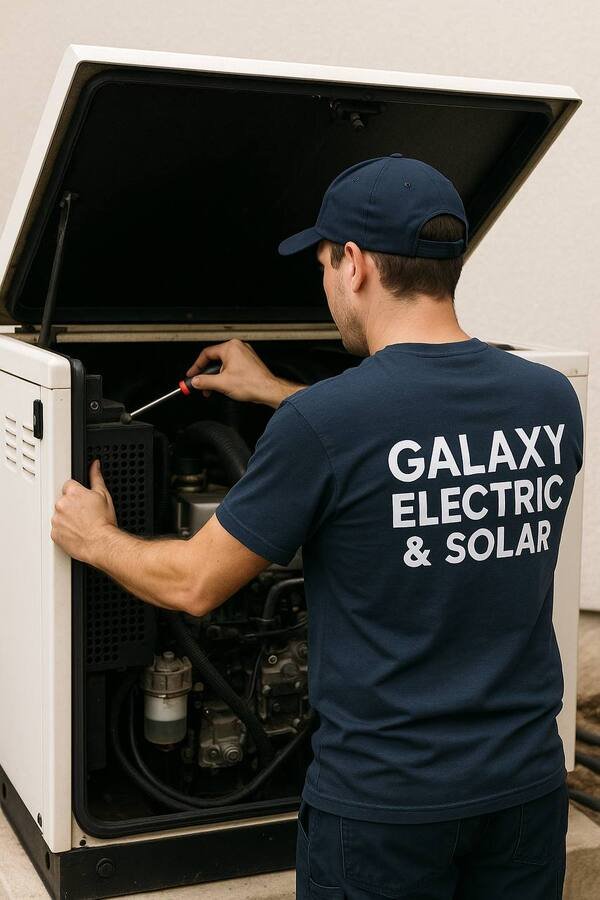
When the lights go out, your generator becomes a lifeline. But what protects your protector? Outdoor generators face a relentless barrage of elements—rain, snow, dust, UV rays, and even curious critters. Mastering the Installation, Use & Maintenance of Generator Covers isn't just about extending your equipment's lifespan; it's about ensuring reliability when you need it most, enhancing safety, and even improving your property's curb appeal. Think of a good cover as an insurance policy against the elements, a silent guardian that keeps your generator primed for action.
At a Glance: Your Quick Guide to Generator Cover Essentials
- Why Cover? Protects against weather (rain, snow, UV, wind), dust, dirt, moisture, pests, and even deters theft.
- Choose Wisely: Select heavy-duty, waterproof, UV-protected, and breathable fabrics (polyester, vinyl) with strong seams and secure closures.
- Measure Accurately: A snug fit is crucial; too loose, and it's useless against wind; too tight, and it won't fit.
- Prep First: Always clean and dry your generator thoroughly before covering it.
- Location Matters: Place your generator on a dry, flat, elevated surface with good drainage, away from structures and vegetation.
- Ventilation is NON-NEGOTIABLE: Whether a cover or an enclosure, adequate airflow prevents overheating, moisture buildup, and rust. Never block exhaust or air vents.
- Secure It: Use straps or bungee cords to prevent wind from dislodging the cover.
- Maintain Regularly: Inspect for damage, clean periodically, and ensure the cover is dry before storing or reapplying to prevent mold.
- DIY Enclosures: Great for custom protection but demand high-quality materials and meticulous ventilation design.
Why Your Generator Demands a Dependable Cover
You've invested in a generator for peace of mind, so why leave it vulnerable? An exposed generator is an open invitation to accelerated wear and tear, potential malfunction, and even safety hazards. A high-quality cover or enclosure isn't just an accessory; it's an integral part of responsible generator ownership.
Here's what a proper cover or enclosure defends against:
- Environmental Assault: Rain, snow, sleet, hail, and extreme humidity can lead to rust, corrosion, and electrical damage. UV rays from the sun degrade plastics and paint, making components brittle over time. High winds can carry abrasive dust and debris, causing minor cosmetic damage or clogging air filters.
- Dust, Dirt, & Debris: Fine particles can infiltrate delicate engine components, air filters, and fuel systems, leading to reduced efficiency and premature wear. Leaves, twigs, and other yard debris can also accumulate, blocking vents or exhaust.
- Moisture Buildup: Beyond direct rain, condensation can form inside the generator, especially with temperature fluctuations. A breathable cover helps mitigate this, preventing mold, mildew, and internal rust.
- Pest Infestation: Spiders, insects, mice, and other rodents often seek shelter in warm, protected spaces. They can chew through wiring, build nests, and cause significant damage, not to mention creating fire hazards.
- Theft Deterrence: While not foolproof, a generator hidden under a cover is less visible to opportunistic thieves. An enclosure can be built with locking mechanisms for enhanced security.
- Safety Barrier: For generators with exposed moving parts, a cover prevents accidental contact by children or pets, a critical safety benefit.
- Aesthetic Appeal: Let's face it, a bulky generator isn't always a sight for sore eyes. A well-fitted cover or a neatly constructed enclosure can help it blend into your outdoor space, improving curb appeal.
Understanding these threats underscores why covering your generator isn't optional—it's essential.
Choosing the Right Pre-Manufactured Generator Cover: Your First Line of Defense
Selecting the perfect pre-manufactured cover is less about aesthetics and more about robust protection. It's about finding the right material, the precise fit, and the essential features that stand up to the elements year after year.
Material Matters: Built to Last
Not all fabrics are created equal when it comes to generator protection. Look for covers made from:
- Heavy-Duty Polyester or Vinyl: These are the workhorses of outdoor covers. Polyester, often coated for water resistance, offers durability and UV protection. Vinyl is inherently waterproof and often thicker, providing excellent weather resistance.
- Waterproof and Windproof: This is non-negotiable. The material should repel water completely and be thick enough to resist tearing or flapping excessively in strong winds.
- UV Protection: Sunlight is a silent killer for outdoor plastics and fabrics. UV-resistant materials prevent fading, cracking, and premature degradation of the cover itself, extending its lifespan and that of the generator beneath.
- Breathability: While waterproof, a good cover isn't airtight. Some materials or designs incorporate breathable membranes or vents that allow trapped moisture to escape, preventing condensation, mold, and rust without compromising water resistance.
- Strong Seams and Secure Closures: Double-stitched seams reinforce vulnerable areas, preventing tears. Look for robust zippers, buckles, or drawstrings that cinch tightly around the base of the generator, ensuring a snug, wind-resistant fit.
Precision Sizing: A Snug Embrace
Accuracy here is paramount. An ill-fitting cover is practically useless.
- Measure Everything: Before you shop, grab a tape measure. Accurately record your generator's height, width, and length. Don't eyeball it!
- Allow for Breathing Room: While you want a snug fit, ensure there's a slight allowance for easy placement and removal, and critically, for airflow if the design permits (more on ventilation below).
- The Goldilocks Principle:
- Too Small: The cover won't fit at all, or it will expose critical parts of the generator.
- Too Large: It will flap in the wind, potentially tearing, collecting water, or even blowing off entirely, leaving your generator unprotected. It also won't look as tidy.
Essential Features: Beyond the Basics
Consider these extras for superior performance:
- Reinforced Corners: These areas often take the most abuse from rubbing against the generator's edges or being bumped.
- Integrated Vents: While a breathable material helps, dedicated vents (often mesh-covered) are crucial for allowing internal moisture to escape and preventing dangerous heat buildup. These are particularly vital if you opt for a "run-cover" which allows the generator to operate while covered (though these are specialized and require extreme caution – more on this soon).
- Secure Fasteners: Adjustable straps, bungee cords, or elastic hems are vital for cinching the cover tightly around the generator's base, especially in windy conditions.
Flawless Installation: Getting Your Cover On Right
Once you have the perfect cover, proper installation ensures it performs its job effectively. It's more than just throwing a tarp over it.
Prep Work: Cleanliness is Key
Before your generator goes into its protective shell, give it some love:
- Thorough Cleaning: Use a damp cloth to wipe down the entire generator, removing any dirt, dust, oil, or grime from its surface. A clean generator prevents these contaminants from being trapped against the metal, where they could cause issues over time.
- Dry Completely: This is crucial. Never cover a wet or even damp generator. Trapped moisture is a recipe for rust, corrosion, and mildew growth inside the cover, potentially damaging the engine and electrical components. If you've just hosed it down, give it ample time to air dry in the sun or use a leaf blower to speed the process.
Strategic Placement: Location, Location, Location
Where you put your generator, even with a cover, makes a big difference.
- Dry, Flat Ground: Always choose a spot that is level and drains well. Avoid low-lying areas where water can collect after heavy rain or snowmelt. Standing water around the generator can seep into the base or even lead to ground moisture wicking up, compromising the cover's protection.
- Clear the Clutter: Position the generator away from dense foliage, overhanging trees, or structures that might drip water onto it or restrict airflow. Falling leaves and branches can also accumulate on the cover, creating pools of water or harboring pests.
- Elevate It: Placing your generator on wooden blocks, concrete pavers, or a sturdy plastic pallet elevates it off the ground. This simple step offers multiple benefits:
- Protects from Ground Moisture: Keeps the generator away from damp earth, mud, and standing water.
- Deters Pests: Makes it harder for rodents and insects to access the generator from below.
- Improves Air Circulation: Allows air to flow underneath, further reducing moisture buildup.
Covering Up: The Right Way to Apply
With the generator prepped and placed, it's time to put on the cover:
- Unfold and Orient: Lay the cover out and identify the front, back, and sides. Some covers have specific cutouts for handles, wheels, or exhaust.
- Drape Carefully: Gently drape the cover over the generator, ensuring it's centered and covers all sides down to the base. Avoid dragging it across sharp edges that could cause tears.
- Align Vents/Openings: If your cover has specific vents or cutouts, make sure they align with your generator's corresponding features (e.g., handles, fuel caps, exhaust ports for "running covers").
- Secure Tightly: Use all available straps, buckles, or drawstrings to cinch the cover snugly around the generator's base. This is your primary defense against wind. Ensure there are no large gaps where rain, dust, or pests could easily enter. Verify full coverage without exposed gaps.
The Ventilation Imperative (Revisited)
We can't stress this enough: Proper ventilation is paramount.
- Prevent Overheating: While a cover protects from outside elements, it can also trap heat generated by the engine, even when off (solar gain) or, critically, when running (if it's a run-capable cover/enclosure). Overheating can damage internal components.
- Combat Moisture & Rust: Air circulation helps evaporate any minor moisture that might get trapped, preventing condensation, rust, and mold.
- Never Block Vents: Ensure the generator's built-in air intake and exhaust vents are never obstructed by the cover. This applies whether the generator is running or stored.
Using Your Covered Generator Safely and Smartly
A generator cover is primarily for storage and protection when the unit is not in operation. However, there are specialized "run covers" or enclosures designed to allow limited operation. This distinction is critical for safety.
Running a Generator with a Cover (Extreme Caution!)
Warning: Unless explicitly designed as a "running cover" or within a properly vented and exhausted enclosure, DO NOT run your generator with a cover on. Running a generator with a standard storage cover will inevitably lead to:
- Severe Overheating: Trapping exhaust and engine heat quickly damages the generator and can pose a fire risk.
- Carbon Monoxide Poisoning: Even "run covers" and enclosures require meticulous exhaust routing away from people and buildings. Carbon monoxide (CO) is an odorless, colorless, deadly gas.
- Engine Damage: Lack of proper airflow starves the engine of cooling air, leading to premature wear and failure.
If you have a specialized "running cover" or a permanent enclosure: - Read Instructions Carefully: Follow the manufacturer's guidelines precisely for installation and operation.
- Exhaust Management: Ensure all exhaust fumes are directed safely away from any occupied spaces, windows, and doors. This typically involves a flexible exhaust pipe extension.
- Adequate Airflow: These covers/enclosures will have specific, large openings for cooling air intake and exhaust. Ensure these are never blocked.
- Monitor: Even with a proper setup, always monitor the generator for unusual noises or signs of overheating.
- CO Detector: Always use carbon monoxide detectors in any nearby buildings when a generator is running, even with a properly vented enclosure. Remember that essential safety guidelines for generators extend beyond just the cover.
For standard storage covers, the generator should be completely uncovered and moved to a safe, open-air location for operation.
Smart Accessory Storage
Keep your generator area tidy and safe:
- Waterproof Storage: Store power cords, tools, and other generator accessories in waterproof containers nearby. This keeps them organized and protects them from moisture and pests.
- Away from Heat: Never store flammable materials or heat-sensitive items directly on or next to the generator, even when covered, to prevent hazards.
- Emergency Kit: Consider keeping a small emergency kit (flashlight, first aid, extra fuel stabilizer) with your generator.
Maintaining Your Generator Cover for Years of Service
A generator cover is an investment in your generator's longevity. To protect that investment, the cover itself needs regular care.
Regular Inspections: Catch Problems Early
- Visual Checks: At least monthly, or after any significant weather event, give your cover a quick once-over.
- Look for Damage: Inspect for tears, holes, frayed seams, or signs of UV degradation (fading, brittleness). Small tears can quickly become large ones, compromising protection.
- Check Fasteners: Ensure straps, buckles, or drawstrings are still secure and intact.
- Pest Activity: Look for signs of rodent gnawing or insect nests.
Cleaning & Drying: Keeping it Pristine
- Remove Debris: Regularly brush off leaves, dirt, snow, or other debris that accumulates on the cover. Accumulated debris can hold moisture against the fabric, promoting mildew.
- Gentle Cleaning: If the cover gets dirty, clean it with a mild soap solution and a soft brush or sponge. Rinse thoroughly with water.
- Air Dry Completely: Always, always allow the cover to air dry completely before putting it back on the generator or folding it for storage. Trapped moisture will lead to mold, mildew, and an unpleasant odor, and can even damage the cover material itself.
- Seasonal Care: Before storing your generator for an extended period, or at the change of seasons, give the cover a thorough cleaning and inspection.
Prompt Repairs: A Stitch in Time
- Patching: For small tears or holes, use a heavy-duty fabric repair kit designed for outdoor gear. These often include adhesive patches or fabric glue.
- Reinforcement: For areas showing excessive wear, consider adding a layer of durable tape or fabric glue as a preventative measure.
- Replacement: If the cover is severely damaged, heavily degraded by UV, or no longer provides adequate protection, it's time to replace it. A compromised cover isn't much better than no cover at all. To help you evaluate, you can explore generator covers to see current options and materials.
When a DIY Enclosure Makes Sense (and How to Build It Right)
Sometimes, a simple fabric cover isn't enough. For more robust protection, enhanced security, or the ability to run your generator in place, a custom-built enclosure might be the answer. Building your own allows for customization but requires careful planning and execution.
DIY vs. Commercial Enclosures
- Commercial Options: Available, often well-engineered for specific generators, but can be quite expensive. They might offer features like sound dampening or integrated fuel tanks.
- DIY Benefits: Cost-effective, fully customizable to your generator's dimensions and your specific site, and can be designed to match existing aesthetics.
- DIY Challenges: Requires planning, construction skills, and a deep understanding of generator safety, especially ventilation.
Choosing Materials for Durability
For a DIY build, quality materials ensure longevity and performance:
- Lumber/Plywood: Common and relatively easy to work with. Use pressure-treated lumber for the frame and exterior-grade plywood for panels to resist rot and moisture. Seal or paint all wood surfaces.
- Metal: Offers superior protection against impact, fire, and pests. Sheet metal or corrugated steel can be used. Requires specialized tools and skills for cutting and assembly.
- Durable Plastics: PVC or composite panels can be lightweight and weather-resistant, often requiring less maintenance than wood.
- Roofing: Use durable roofing materials like shingles, metal panels, or even heavy-duty polycarbonate sheets to prevent water intrusion from above.
Location, Location, Location (for Enclosures)
The rules for placing an enclosure are even stricter than for a simple cover:
- Moisture Management: Choose a location that naturally drains well. Consider a concrete pad or gravel base to elevate the enclosure and prevent ground moisture from entering.
- Temperature Extremes: Avoid direct, prolonged sunlight exposure in hot climates, which can lead to excessive internal heat buildup. Conversely, in cold climates, some insulation might be beneficial, but never at the expense of ventilation.
- Proximity to Structures: Crucially, position the enclosure far enough away from your home, other buildings, windows, and doors to prevent carbon monoxide fumes from entering occupied spaces. This is non-negotiable for safety. Check local codes for minimum distances.
Non-Negotiable Ventilation for DIY Enclosures
This is the most critical aspect of any DIY generator enclosure. An enclosure MUST include abundant openings for air circulation. Failing to do so creates a death trap for your generator and potentially for anyone nearby if exhaust isn't properly routed. Remember, how critical ventilation impacts generator performance applies to both covers and enclosures.
- Intake and Exhaust: You need dedicated intake vents (low on the enclosure) and exhaust vents (high on the enclosure, near the generator's exhaust port) for cooling. These should be louvered or screened to keep out rain, snow, and pests while allowing maximum airflow.
- Generator Exhaust Venting: The generator's own exhaust must be routed out of the enclosure, usually via a flexible exhaust pipe connected to the generator's muffler and directed through a dedicated opening in the enclosure wall, away from any structure or person.
- Avoid "Sealing Off": The generator must never be sealed off completely. This will lead to catastrophic overheating, engine damage, and carbon monoxide buildup.
Design Considerations for Your DIY Build
- Accurate Dimensions: Measure your generator precisely. Allow at least 12-18 inches of clearance on all sides of the generator within the enclosure for airflow, maintenance access, and heat dissipation. Don't forget vertical clearance.
- Easy Access: Plan for a large, lockable door or removable panels for easy access to the generator for starting, refueling, maintenance, and repairs. Consider a hinged roof for overhead access.
- Fuel Access: Design a way to refuel the generator without having to remove it entirely from the enclosure.
- Lightning Protection: If you live in an area prone to lightning, consider installing a lightning arrester on your enclosure or ensuring it's properly grounded.
- Sound Dampening: While not the primary goal, some enclosures can incorporate sound-dampening materials (like mass-loaded vinyl or acoustic foam, away from heat sources) to reduce noise. Ensure these materials don't impede airflow.
- Fire Safety: Keep flammable materials away from the generator, even within an enclosure. Have a fire extinguisher readily available.
Common Pitfalls to Avoid with Generator Covers & Enclosures
Even with the best intentions, it's easy to make mistakes. Steering clear of these common errors will save you headaches, money, and potential hazards.
- Covering a Wet Generator: As stressed, this traps moisture, leading to rust, corrosion, and mildew. Always ensure your generator is bone dry before covering it for storage.
- Blocking Vents or Exhaust: Whether it's a storage cover or a run-capable enclosure, obstructing the generator's natural airflow (intake or exhaust) is a critical mistake. It causes overheating, damage, and in the case of exhaust, deadly carbon monoxide buildup.
- Using the Wrong Cover Size: A cover that's too small won't fit; one that's too large will flap excessively, potentially tearing, collecting water, or blowing off entirely. Always measure your generator for a snug, appropriate fit.
- Sealing Off a DIY Enclosure Completely: This is a recipe for disaster. Any enclosure, especially one for a running generator, must have ample and properly designed ventilation for both cooling air and exhaust gas removal.
- Ignoring Maintenance: A neglected cover or enclosure won't protect your generator effectively. Tears in the cover or blocked vents in an enclosure compromise its purpose. Regular inspection and cleaning are non-negotiable. Don't forget that portable generator maintenance tips are also crucial for the generator itself, not just its cover.
- Running a Storage Cover: Never attempt to run a generator with a standard storage cover on. These are not designed for operation and will cause immediate and severe problems.
- Inadequate Distance from Home: For any running generator, whether covered or not, failing to maintain a safe distance from your home or other buildings risks carbon monoxide poisoning. Always operate in a well-ventilated, open area.
Quick Answers to Your Generator Cover Questions
Got more questions? Here are some common queries we often hear:
Can I run my generator with the cover on?
Generally, no, unless you have a specialized "run cover" or a properly designed, vented, and exhausted enclosure. Most covers are for storage only. Running a generator with a standard cover on will cause it to overheat, potentially damage the engine, and create a carbon monoxide hazard. Always consult your cover and generator manuals.
How often should I clean my generator cover?
It depends on your environment. In dusty or leafy areas, monthly visual checks and brushing off debris are good. A thorough cleaning with soap and water is recommended every few months, or before long-term storage, ensuring it's completely dry afterward.
What's the best material for a generator cover?
Heavy-duty polyester or vinyl with a waterproof coating and UV protection are excellent choices. Look for added features like breathable vents, strong seams, and secure tie-downs for optimal performance.
How do I prevent my generator cover from blowing away in the wind?
The key is a snug fit and secure fasteners. Choose a cover that matches your generator's dimensions, then utilize all available straps, buckles, or drawstrings to cinch it tightly around the base. Placing heavy objects (like sandbags, if they don't block vents) around the base of the cover can also help, but secure fastening is paramount.
Does a generator cover really deter theft?
Yes, to some extent. A covered generator is less visible and identifiable, making it less of an obvious target for opportunistic thieves. However, it's not a security solution on its own. For increased security, consider chaining the generator to an immovable object or using a lockable enclosure. Understanding your needs, you can selecting the ideal generator for your needs and then its protection.
Your Next Step to Generator Protection
You've invested in a generator for reliable power, so ensure it's protected by the best practices for Installation, Use & Maintenance of Generator Covers. Whether you opt for a durable pre-manufactured cover or embark on building a custom enclosure, prioritize material quality, accurate sizing, and above all, meticulous ventilation.
A well-chosen and properly maintained cover isn't just an expense; it's an investment in your generator's longevity, reliability, and safety. By following these guidelines, you'll ensure your generator is always ready to deliver power, come what may, quietly standing guard until its moment to shine.